10 Steps for Starting an Organic Garden
Whether you want to grow vegetables and herbs for your family meals, or just want to have more flowers and color in your yard, gardening is an easy and fun hobby.
Whether you want to grow vegetables and herbs for your family meals, or just want to have more flowers and color in your yard, gardening is an easy and fun hobby.
I always garden organically. Why spray pesticides and herbicides that are toxic when it is simply not necessary?
The hardest thing about organic gardening is figuring out how to get started. It seems like there is so much to learn, so much to know before you can start gardening. It’s really not hard at all, and once you get started you will see — and soon enough you will be a pro!
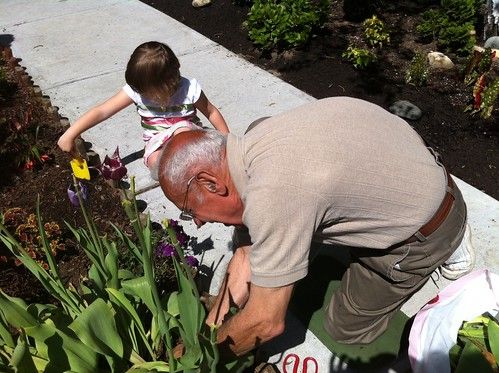
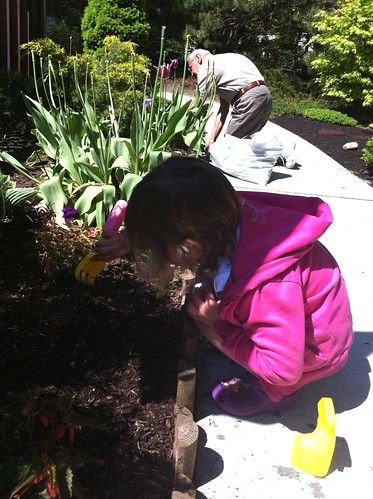
Note: We are still in Amsterdam so I can’t start my garden until June 1st. The photos are of Kate gardening with her Papa in NY right now sent to me via iPhone (Thanks Bubbe!)
10 Steps for Starting an Organic Garden
Here are my 10 steps for starting an organic garden:
1. Check Out a Zone Map
The United States is split up into numbered zones for gardening. Depending on where you live, you will be able to plant different things.
My zone in Southern California is 22. Here’s what the Zone Map says:
Areas falling in Zone 22 have a coastal climate (they are influenced by the ocean approximately 85 percent of the time). When temperatures drop in winter, these cold-air basins or hilltops above the air-drained slopes have lower winter temperatures than those in neighboring Zone 23. Actually, the winters are so mild here that lows seldom fall below freezing. Extreme winter lows (the coldest temperature you can expect in 20 years) average 28 to 25°F (-2 to -4°C). Gardeners who plant under overhangs or tree canopies can grow subtropical plants that would otherwise be burned by a rare frost. Such plants include bananas, tree ferns, and the like. The lack of a pronounced chilling period during the winter limits the use of such deciduous woody plants as flowering cherry and lilac. Many herbaceous perennials from colder regions fail here because the winters are too warm for them to go dormant.
This is why I can grow avocados, lemons and tomatoes.
Look up your climate zone here.
2. Figure Out Where to Plant
Look around your yard and figure out where you want to plant. Look for very bright, sunny patches for vegetables and herbs. If you have shady spots, you will have to plant shade-tolerant plants there.
If you don’t have a yard, you can do container gardening. I have lots of plants in pots on my patio. You might also look in your area to see if there is a community garden available.
If you do have a yard but no garden staked out, it’s very easy to start a garden directly on the grass — no digging required. The book I recommend is Lasagna Gardening: A New Layering System for Bountiful Gardens: No Digging, No Tilling, No Weeding, No Kidding!
I have done several lasagna gardens over the years and they work phenomenally well. And you don’t need to mow the grass or dig or plow the dirt. Just lay some sopping wet newspaper or cardboard boxes down on the grass, cover with manure and compost, and start planting. It’s that easy. Get the book for more info.
3. Decide What to Plant
Once you know your zone and how much sun is available in the location you are planting, you can decide what you want to plant. I like the Sunset Plant Finder tool. (You can find other ones online — Martha Stewart has a a decent one, too.)
You can choose plants based on how much sun or shade they need, whether they are annuals or perennials (annuals only last one season but perennials come back every year), and how much water they need.
4. Plan Your Watering System
This is critical. I have been doing organic gardening for many years now. There have been times when I did not have a sprinkler system set up — and guess what? The plants died.
Now, some of you out there may be more regular than I am and perhaps you will be more compelled to water your garden very regularly. I am always so busy, I don’t remember to get out there very often. If you are going to water on your own you need to be very consistent. I noticed my plants grew dramatically better when I watered very consistently.
On hot sunny days, every morning is best, preferably at the same time each day. It is also best to water early in the morning — not when it is too hot and sunny — otherwise you can burn the plants.
If you’re like me and can’t manage to do the watering every day, a sprinkler system is the way to go. If you can’t afford an expensive sprinkler system, I really recommend rigging up a basic system. It’s so easy to do. Just go to the hardware store and get some soaker hoses, connect them to your hose, and hook them up to a timer. Battery-powered timers are cheap and they are very reliable.
And yes, you can even buy miniature soaker hose systems for container gardens!
5. Buy Compost and Manure
Compost is the best thing you can do for your soil, and it’s critical to have good soil in order to get good, thriving plants. Good soil equals black, crumbly loam full of wriggling earthworms. If your soil is too sandy or has too much clay, you can balance it by adding compost.
If you don’t already have a compost bin and a supply of compost, you need to buy compost. You can find organic compost at most nurseries.
I also always buy manure. Manure will make a huge difference in your garden. I know you can find organic manure but I don’t usually go out of my way to get that — I just use the manure they have at the nursery. You might try asking a local farmer if they will sell or give you some of there animal manure.
In addition to compost and manure, you also need some kind of mulch. Mulch protects the topsoil. If you don’t mulch, all the good, black soil you’ve worked so hard to create will end up blowing away. Types of mulch include: wood chips and bark, cypress mulch, straw (I love straw!), pine needles, cocoa bean hulls (this is another of my favorites), or other organic materials such as grass clippings.
You can also use newspaper on top of your garden, then layer it with other organic material. I really like using newspaper in my garden.
It’s used in Lasagna Gardening: A New Layering System for Bountiful Gardens: No Digging, No Tilling, No Weeding, No Kidding!
Best of all, it prevents weeds from coming up. It also as the benefit of breaking down and decomposting, unlike black plastic (I really hate black plastic mulching and I refuse to use it).
6. Buy Fertilizer and Beneficial Insects if Necessary
You don’t really need fertilizer for all plants. I generally use compost and manure as my fertilizer. Some plants do need extra nutrients in order to produce fruit, such as citrus trees and avocados.
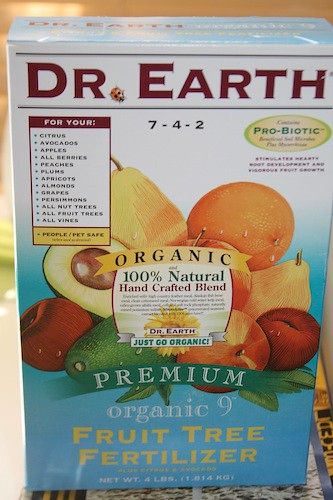
If you do buy fertilizer, look for organic fertilizer. Miracle Gro is not organic. Synthetic fertilizers are made from natural gas and petroleum and are not sustainable. Organic fertilizers have less environmental impact on the earth and yet still supply plants with the nutrients they need. To identify organic fertilizers, you will be able to pronounce the sources on the label (animal by-products like bone and blood meals, kelp and fish meal, etc). It will also say organic on the label.
You also might want to get some beneficial insects. These natural predators include lady bugs, lacewings, decollate snails. I especially like the decollate snails — they love to eat slugs.
7. Buy (or Borrow) Tools and Equipment
You don’t need much. Just a decent large shovel or spade, a small shovel or two, and some gardening gloves. I also find that a wheelbarrow is very helpful for carting around all that manure and compost. I also like to designate a pair of old clogs or Crocs just for gardening (although sometimes I like to garden barefoot!).
If you are starting seeds, you may want to start them indooors to get a jump on the growing season. I set up an awesome seed starting area once in my garage. I used old egg cartons set on some shelves, and strung work lights over them. Most seeds can be started outdoors, but there are some that you will want to start indoors (read the label on the seed package).
8. Buy (or Trade) Seeds or Starters
Look for organic seeds. Click here to see sources on my resources page.
If you’re late getting started and don’t want to wait for seeds to sprout, you can get organic plant starters at many nurseries and farmer’s markets.
9. Get the Soil Ready and Plant
Now it’s time to have some fun in the dirt. I like the lasagna method of using wet newspaper, then layering compost and then manure and other organic materials “lasagna-style”. You can do this on existing gardens or when making a brand new garden plot. When using manure, it’s best to lay it out when it is not too hot or sunny outside, otherwise it can burn your plants.
Now all you have to do is plant your seeds or starters, and then watch them grow.
10. Easy Maintenance
Maintaining your garden should not be a lot of work if you have it set up right.
Make sure your plants get watered regularly (sprinklers make this an automatic done deal).
You’ll want to prune your tomatoes and other plants from time to time so they don’t get too leggy and will produce more fruit.
Weeding should be relatively easy if you have good black soil full of worms. The better your soil, the less weeds and pests you will have. When in doubt, toss on more compost and manure.
Let’s Get Started!
I hope you will join me this season in starting an organic garden. Real Food Media has partnered with Seeds of Change this year to help spread the word about organic gardening.
If you already have a garden, will you post about it online to help spread the word with us? Or, if you don’t blog, will you post on Facebook or Twitter?
How to Participate
Here’s how you can participate online and share with others:
Join us on Facebook to share our gardening progress. Here’s how to participate:
1. Snap some photos of your garden.
2. Like Seeds of Change on Facebook. Click here: https://www.facebook.com/seedsofchange
3. When you have some photos of your garden, post them to the Seeds of Change Facebook wall. Make sure you include (1) a caption and (2) this link https://bit.ly/seedsofchangevirtualgarden so they know you are submitting the photo to the Virtual Garden.
Once you link to your photo on their wall, they will post them in their Virtual Garden album.
1. Follow Seeds of Change on Twitter: @seedsofchange
2. Tweet about the campaign, and encourage your followers to join in the fun! Please use the special hash tag, #sowingmillions.
3. Join us for a monthly Tweetchat to talk about organic gardening and share your progress. Be sure to follow me on Twitter @cheeseslave and I’ll announce the next one.
Save on Seeds
Visit my resources page to buy seeds. Seeds of Change is offering FREE shipping on orders over $30 through May 30th. Just use code FREESHIPPING at checkout.
Share Your Comments
Please comment below and share your ideas, goals, and questions. And let us know if you are starting a garden this year (or continuing your current garden). I hope you’ll join us in our effort to spread the word about organic gardening online!
Disclosure: I wrote this post while participating in the Sowing Millions Project by Real Food Media on behalf of Seeds of Change. I received product and exclusive content to facilitate my post. My thoughts and opinions are my own and not of those of Real Food Media or Seeds of Change.


Comments ()