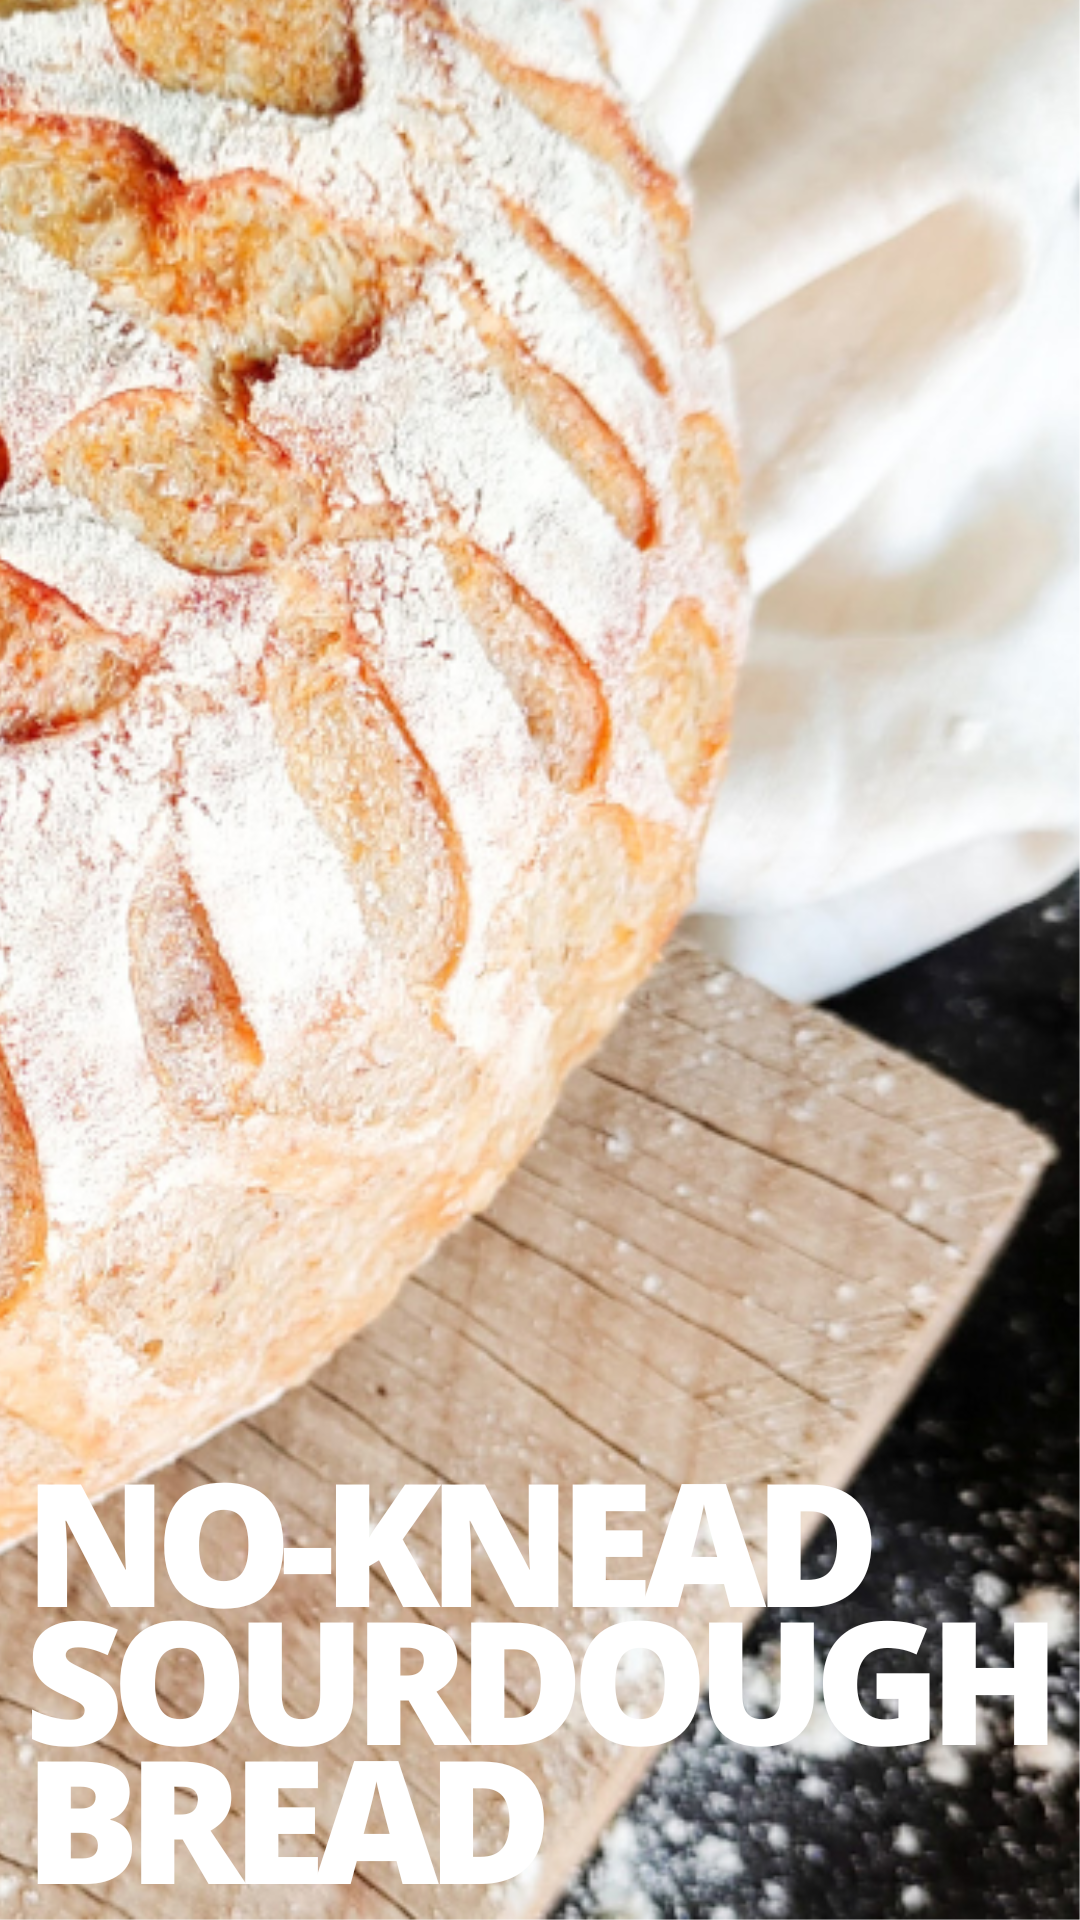
No-Knead Sourdough Bread
Do you want to learn how to make no-knead sourdough bread? This recipe is simple and so easy once you get the hang of it.

Do you want to learn how to make no-knead sourdough bread? This recipe is simple and so easy once you get the hang of it.
Fifteen years ago, when my daughter was little, my friend Janis taught me her method for baking artisan no-knead sourdough bread.
I’m very excited to share it with you. You can make this bread in your own kitchen for only $1 per loaf, just using a Dutch oven.
No Knead Sourdough Bread: The Lazy Way to Make Bread
This no-knead sourdough bread is so easy to make. It is no-knead, people. You don't need a stand mixer or a Bosch. No kneading or mixing whatsoever.
Just put the flour and the starter in a bowl and let it sit there overnight (well, 18-19 hours to be exact). Then you shape it, let it sit out while the oven preheats, and then bake.
What could be easier?
No knead bread appeals to me because I’m inherently lazy.
Yes, I’m a crazy, driven workaholic who averages 10-12 hour workdays.
But when it comes to cooking, gardening and housekeeping, I like to keep things as simple and easy as possible. (So I can work more — ha!)
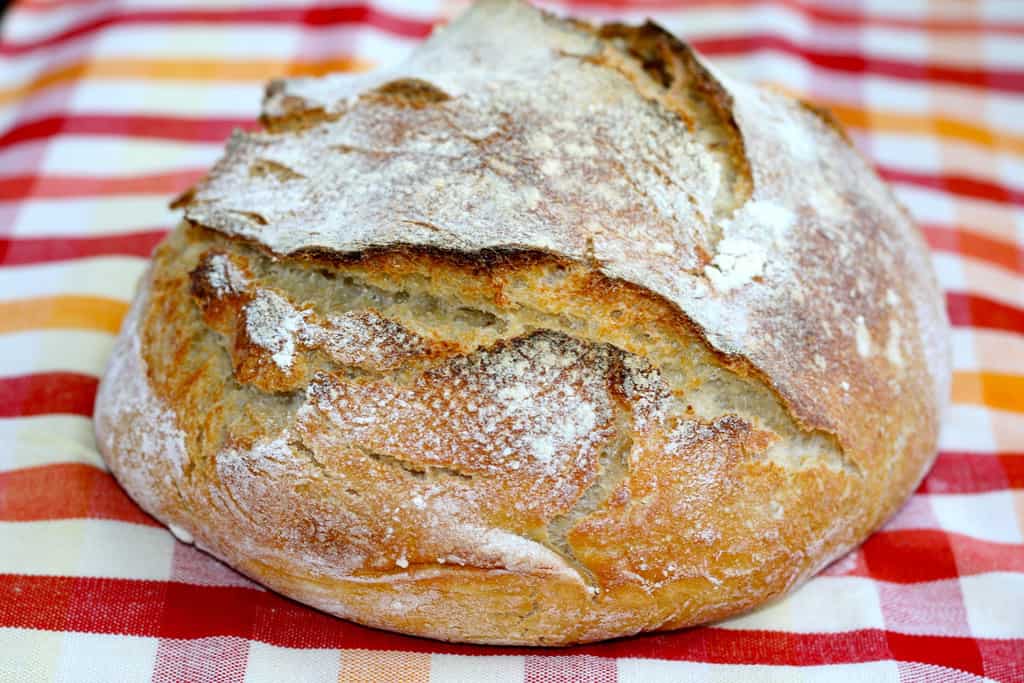
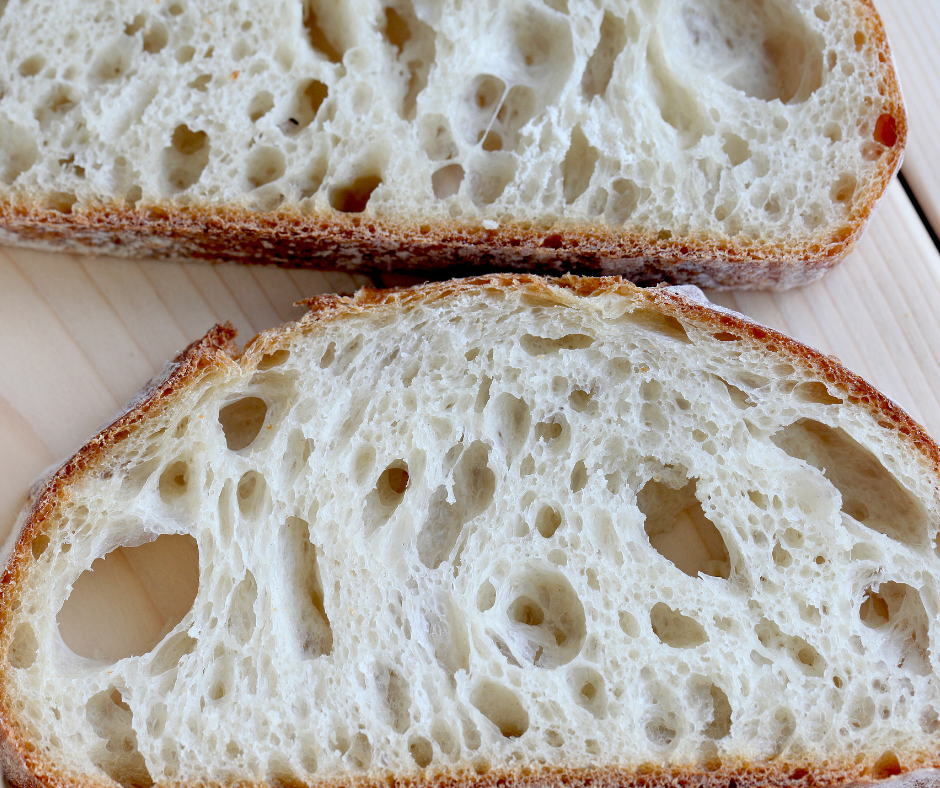
This bread is beyond delicious. Not only that, as you can see from the photo above, it’s also beautiful. You will love it!
And it’s easy to make. Just follow the directions exactly.
When I learned how to make this bread almost 15 years ago, I took very detailed notes, and I worked hard to be very precise with the recipe.
Do not fool around with this — just do exactly as I have outlined and you will have perfect, delicious bread.
No-Knead Sourdough Bread

No-Knead Sourdough Bread
This bread is so easy to make. No kneading required, and all you need is a Dutch oven. Best of all, it costs a fraction of what you would pay in the store.
Makes 1 loaf (16 servings)
Nutrition information: Calories: 160; Carbs: 33 g; Fats: .5 g; Protein: 6 g
Ingredients
Sourdough starter (1/4 cup)
Filtered water (12 oz + extra to activate starter)
Unbleached, all-purpose white flour – I used King Arthur (16 oz + extra to activate starter and some to put on your board)
Sea salt (1/2 tsp)
Rice flour, for dusting
Equipment
Large glass or ceramic mixing bowl (not stainless steel)
Dutch oven or stock pot
Very large cutting board or or a very clean countertop
Banneton or colander lined with a dishcloth
Knife
Optional: plastic dough scraper
Directions
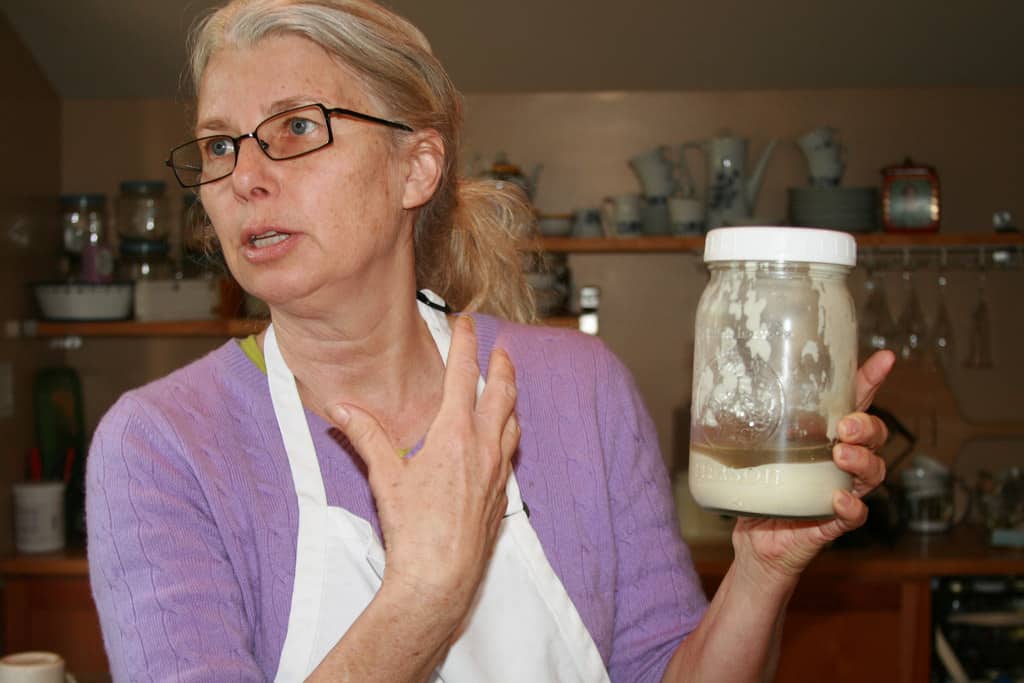
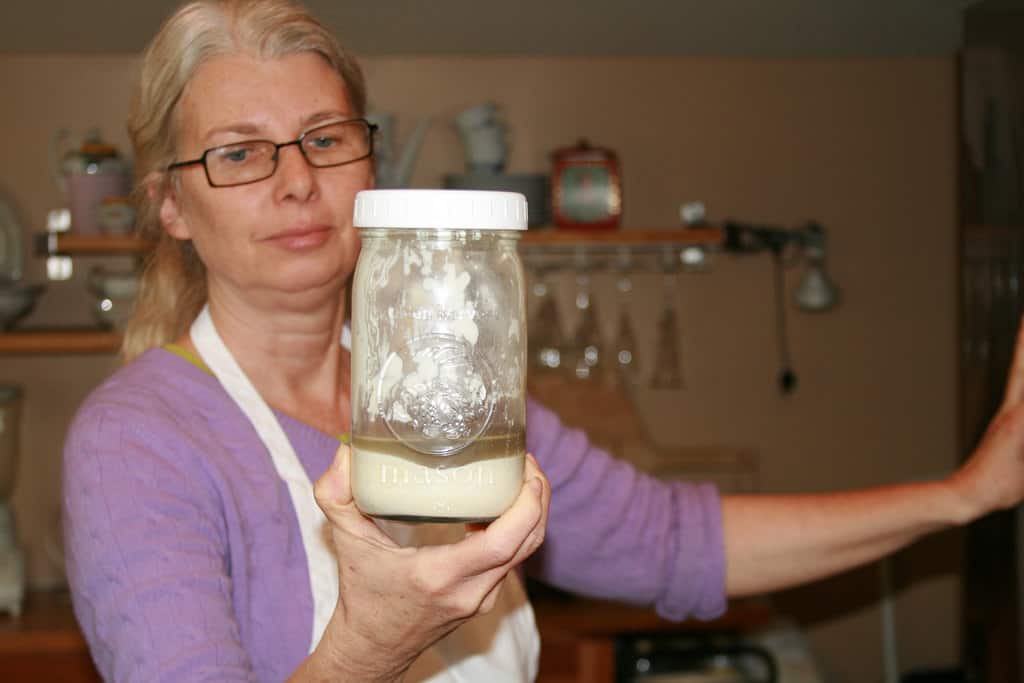
1. Follow directions (see below) on making and activating a sourdough starter, feeding it every 8 hours until it is super-bubbly and active. It should look like a flour-and-water version of Champagne. You should see lots of bubbles and holes on the top.
2. Put 12 ounces of filtered water (at body temperature — not ice cold) in a bowl or glass measuring cup. Add 1/4 cup of active sourdough starter to the cup and set aside.
3. In a large glass or ceramic (not stainless steel) mixing bowl, stir or whisk together 16 ounces white flour and 1 1/2 teaspoon sea salt.
4. Add sourdough starter and stir together with a wooden spoon.
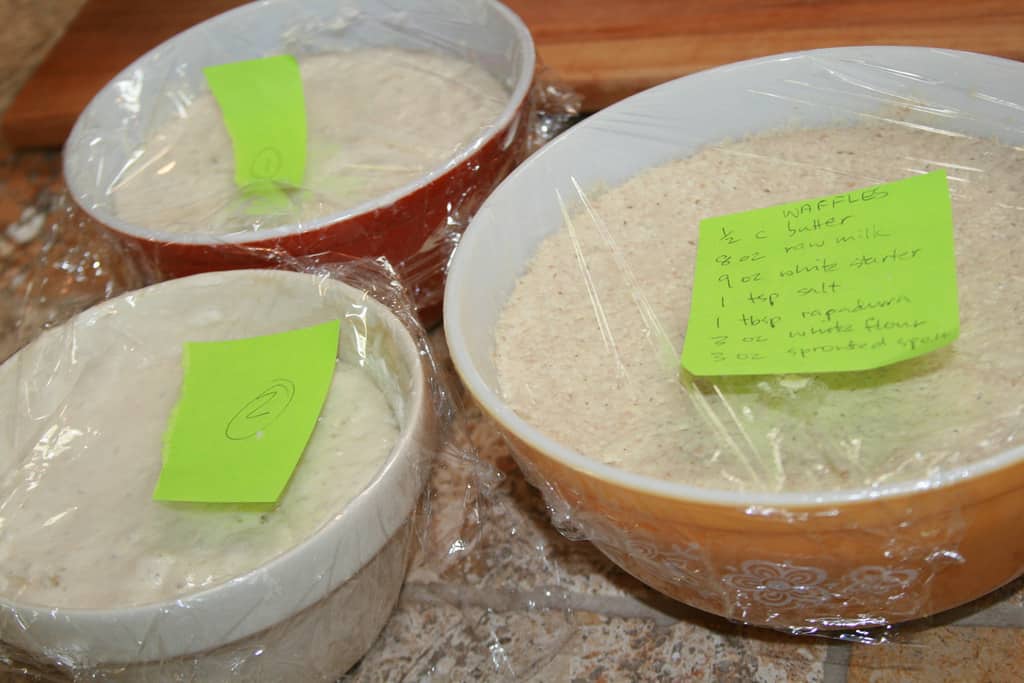
5. Cover the bowl with plastic wrap and leave on the counter for 18-19 hours. If your kitchen is very cold, set your bowl in a warm place. You can make a note to yourself on a sticky and put it on top of the bowl, or set an alert on your iPhone (Janis uses the stickies — I use the iPhone).
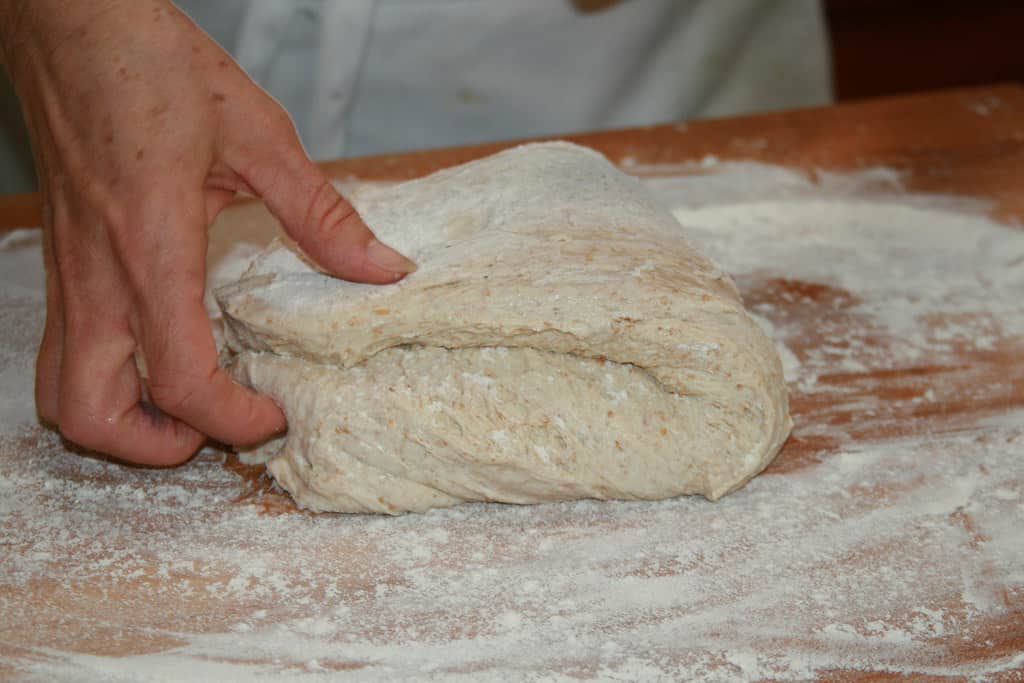
6. 18-19 hours later, sprinkle white flour on a wooden board or large cutting board (or a clean countertop). With clean hands, gently scoop the dough out of the bowl and carefully set it on your floured surface. It helps to have a dough scraper to do this. You can get a plastic dough scraper for less than a dollar at gourmet shops or restaurant supply stores. You can also use a wooden spoon or your hands (it can help to put a little flour on your hands).
7. Fold the dough on top of itself three times. 1-2-3, that’s it. There is no kneading required — you’re just helping to disperse the gluten a bit.
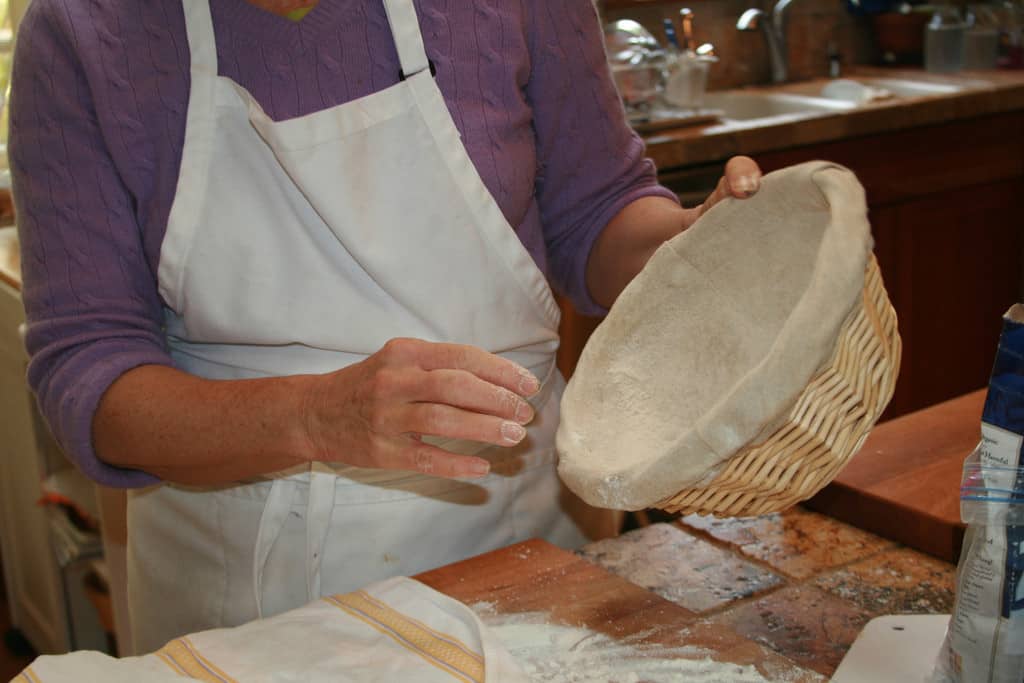
8. Cover with a dishtowel and let sit on the board for exactly 15 minutes (set your timer). 15 minutes later, sprinkle a little rice flour into the bowl of a banneton (pictured below) or colander lined with a thin dish cloth (not one of those big thick terrycloth ones — use a thin cloth).
9. Very carefully put the dough into the banneton or cloth-lined colander, top side down. In other words, the top of the blob of dough should go down into the banneton, where the sprinkled rice flour is. That is going to be the top of your loaf when it bakes.
10. Cover the banneton or colander with another dishcloth and let it sit on the counter or in a warm place for 1 1/2 hours.
11. After one hour has passed, preheat oven to 500 degrees F and set the Dutch oven with lid on inside the oven, on the middle rack. You will let the Dutch oven, lid on, heat up in the oven for 30 minutes.
12. When 30 minutes have passed (and the dough has risen in the banneton or colander for a total of 1 1/2 hours), carefully take the very hot Dutch oven out of the oven.
13. Sprinkle some rice flour on your hands and very gently transfer the dough into the Dutch oven. The top of the loaf, which was facing down in the banneton or colander, will be facing right-side up in the Dutch oven.
14. Cover and put in the oven, immediately turning the heat down to 450 degrees (You may have to go as low as 400 — all ovens are different. Start with 450 and see how it goes — 450 worked great for me.).
15. Let bake for 1/2 hour, then take the lid off and turn the oven down to 400 degrees. Bake for 15 more minutes.
16. Serve warm with lots of grass-fed butter.
How To Make a Sourdough Starter
See my post: How to Make a Sourdough Starter from Scratch (video included)
How To Activate a Sourdough Starter
A bubbly, active sourdough starter is really the key to a good loaf of sourdough. If your starter is not active enough, your bread will not rise.

Janis does not feed her starter every day. She keeps it in her fridge. She just lets it sit in there, with the “hooch” liquid on top, indefinitely.
When she wants to make bread this is what she does...
1. Take 2 teaspoons of sourdough starter and put it in a glass or ceramic bowl.
2. Stir in 1 ounce or 2 tbs each of room temp filtered water and flour. (Janis uses a digital scale to do this. You put a bowl on the scale, reset the weight to zero, then adds the starter.)
3. Around 8 hours later, measure your sourdough starter. (Again, it’s good to use a digital scale.)
4. Add equal parts flour and filtered water. In other words, if you have 2 oz starter, add 2 oz flour and 2 oz water.
5. Let sit for 8 hours, repeat the feeding one more time.
6. Let it sit for another 8 hours. You may have to feed it even one more time after that. See how bubbly it is & use your discretion.
To keep your starter active & bubbly, you need to continue to feed it at least every 12 hours and it has to be equal parts (1/3 starter, 1/3 filtered water & 1/3 flour). I feed my sourdough starter when I wake up in the morning and when I go to bed at night.
Recipe Notes: White Flour – Best for Sourdough Newbies
Janis spent a long time researching and perfecting this recipe. I think that’s why it comes out so well — she really paid attention to details. She uses white flour in this recipe because her family prefers it.

You can try using part whole wheat flours, but Janis recommends starting with white flour the first time you bake sourdough bread. It is easier for most folks to get the hang of.
Janis has since informed me that she worked on it and she got great results with 100% plain spelt flour (not sprouted). Since the sourdough starter breaks down the phytic acid and other anti-nutrients, it’s fine to just use plain spelt or whole wheat flour.
But try it with white flour first. If you succeed, then move on to a whole grain flour (ideally, freshly ground — it’s more nutritious).
Got Questions
Please ask me in the comments.
Pin This Post


Comments ()